
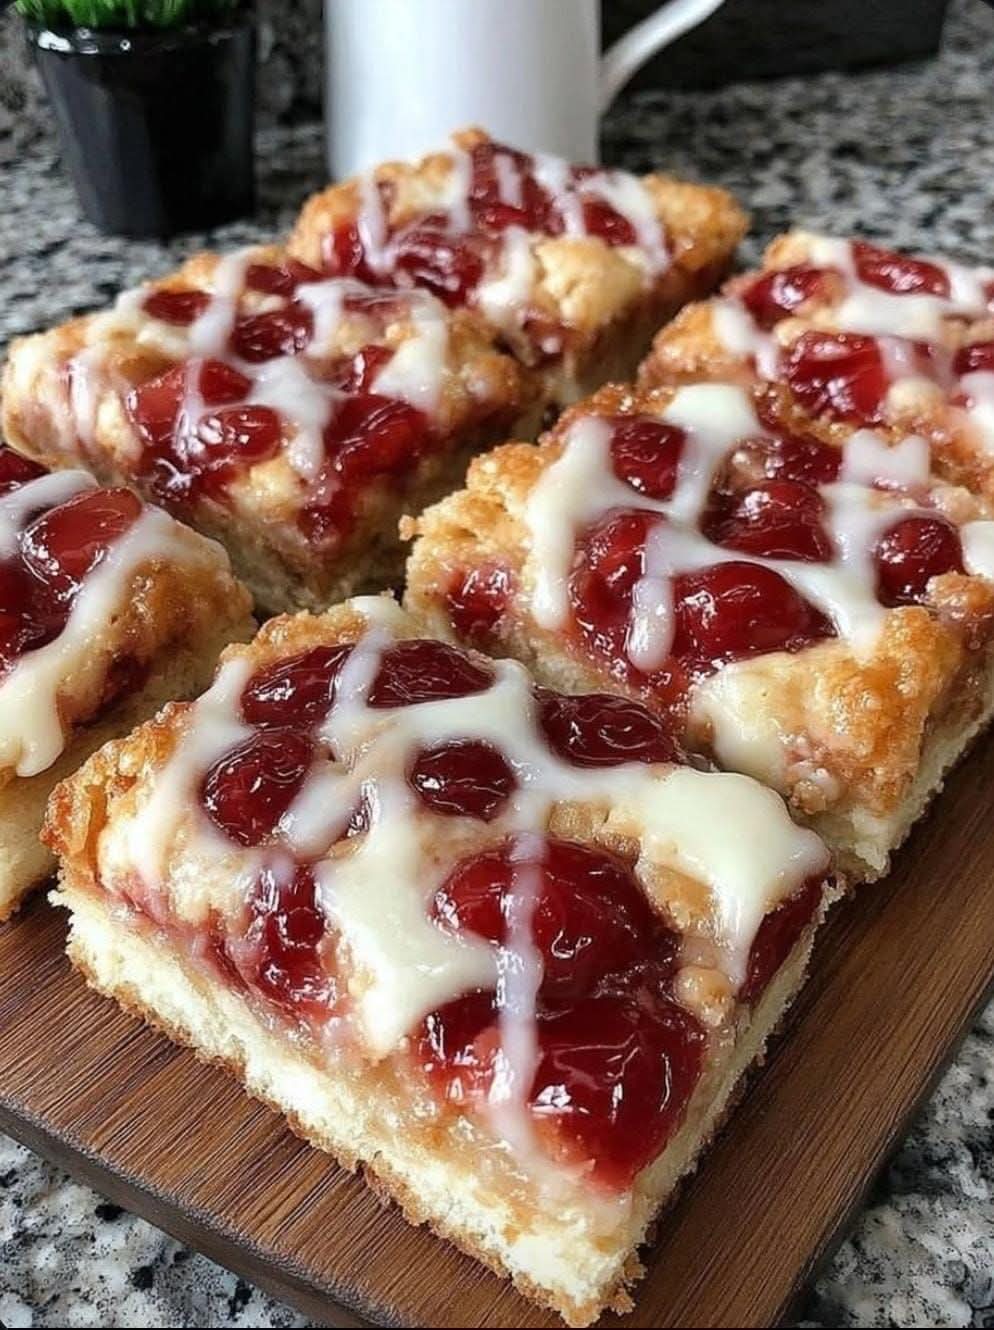
Cherry Bars for a Crowd
Introduction
Cherry Bars for a Crowd are a classic homemade dessert designed for sharing. They combine a rich, buttery brown-sugar crust with a generous layer of sweet-tart cherries and a soft, golden topping. The result is a dessert that is easy to slice, easy to transport, and perfect for family gatherings, potlucks, bake sales, holidays, picnics, and afternoon coffee.
These bars have the comforting character of an old-fashioned fruit dessert without requiring the work of making a traditional pie. Instead of rolling and shaping pastry, the buttery dough is pressed into a baking pan, layered with cherry filling, and finished with another portion of the dough.
Ingredients
For the Crust and Topping
3/4 cup unsalted butter, softened
1 cup packed brown sugar
1/2 cup granulated sugar
2 large eggs
1 teaspoon vanilla extract
2 cups all-purpose flour
1 teaspoon baking powder
1/2 teaspoon salt
For the Cherry Filling
2 cans cherry pie filling, approximately 21 ounces each
1 tablespoon lemon juice
1/2 teaspoon vanilla extract
1/4 teaspoon almond extract, optional
Optional Glaze
1 cup powdered sugar
1 to 2 tablespoons milk or heavy cream
1/2 teaspoon vanilla extract
Instructions
Step 1: Prepare the Oven and Pan
Preheat the oven to 350°F (175°C).
Grease a 9-by-13-inch baking pan thoroughly. For easier removal, line the bottom with parchment paper, leaving some paper extending over the sides.
Step 2: Make the Buttery Dough
Place the softened butter, brown sugar, and granulated sugar in a large mixing bowl.
Beat until the mixture becomes creamy and well combined. Add the eggs one at a time, mixing well after each addition. Stir in the vanilla extract.
In a separate bowl, whisk together the flour, baking powder, and salt.
Gradually add the dry ingredients to the butter mixture. Mix just until a thick, soft dough forms. Avoid overmixing, because excessive mixing can make the bars heavier.
Step 3: Prepare the Cherry Filling
Place the cherry pie filling in a bowl. Stir in the lemon juice, vanilla extract, and almond extract if using.
The lemon juice helps balance the sweetness of the cherries and gives the filling a brighter fruit flavor.
Step 4: Form the Bottom Layer
Spread approximately two-thirds of the dough evenly across the prepared baking pan.
Use lightly greased fingers, a spatula, or the back of a spoon to press the dough into an even layer.
Make sure the dough reaches the corners of the pan.
Step 5: Add the Cherries
Spoon the cherry filling over the dough.
Spread it gently into an even layer, leaving a small border around the edges if possible.
The cherries should form a generous layer without completely covering the pan with excess liquid.
Step 6: Add the Topping
Drop small spoonfuls of the remaining dough over the cherry filling.
You do not have to cover every bit of the cherries. Leaving small spaces allows some of the bright cherry filling to remain visible after baking.
For a more even topping, gently flatten small pieces of dough between your fingers before placing them over the cherries.
Step 7: Bake
Place the pan in the preheated oven and bake for approximately 35 to 45 minutes.
The bars are ready when the top is golden brown and the edges are lightly browned. The center should look set rather than wet or liquid.
Because ovens vary, begin checking around the 35-minute mark.
Step 8: Cool Completely
Remove the pan from the oven and place it on a cooling rack.
Allow the bars to cool completely before cutting. This is important because the cherry filling continues to set as it cools.
For especially clean slices, refrigerate the cooled bars for 30 to 60 minutes before cutting.
Step 9: Make the Glaze
If you want to add a simple glaze, whisk together the powdered sugar, milk, and vanilla until smooth.
Drizzle the glaze over the completely cooled cherry bars.
Allow the glaze to set for several minutes before slicing.
Method
The method behind these cherry bars is simple and reliable. First, the butter and sugars are creamed together to create a rich foundation. Eggs provide structure and help keep the baked dough tender. Flour, baking powder, and salt are then incorporated to create a soft dough.
Part of the dough becomes the bottom crust, while the remaining dough is used as the topping. The cherry filling sits between these two layers, creating a contrast between buttery pastry-like dough and juicy fruit.
The dessert is baked until the dough becomes golden and the cherry filling is bubbling gently. Cooling is an important part of the process because it allows the fruit layer to firm up enough for neat serving.
History
Fruit-filled bars have long been popular in American home baking because they offer many of the flavors associated with fruit pies without requiring a traditional pie crust.
Cherry desserts became particularly popular because cherries provide a natural balance of sweetness and tartness. Cherry pie, cherry cobbler, cherry crisps, and cherry-filled pastries have all become familiar forms of home-style baking.
Cherry bars developed as a practical variation of these fruit desserts. A large rectangular pan makes them especially convenient when serving many people. Instead of preparing individual pastries or slicing a single pie into relatively small portions, one pan can produce numerous dessert squares.
Recipes like this also fit naturally into the tradition of community baking, where desserts are prepared for church gatherings, family reunions, school events, holidays, neighborhood celebrations, and potluck dinners.
Formation and Texture
The bottom layer should be firm enough to support the cherry filling while remaining soft and buttery.
The cherry center provides moisture and a concentrated fruit flavor.
The top layer becomes lightly golden during baking and gives each square a tender, slightly crumbly texture.
Once completely cooled, the three components come together beautifully: a buttery base, a bright cherry center, and a golden topping.
Tips for Perfect Cherry Bars
Use softened butter rather than melted butter. Softened butter creates the proper texture in the dough.
Do not overmix the batter after adding the flour. Mix only until the ingredients are incorporated.
Spread the bottom layer evenly so that every serving has a balanced crust.
Let the bars cool completely before cutting. Cutting them while hot can cause the cherry filling to spread.
For sharper slices, chill the finished bars before cutting.
If using homemade cherry filling, make sure it is thick enough that it will not release excessive liquid into the crust.
For a stronger cherry-almond flavor, add a small amount of almond extract to the filling.
Serving Suggestions
Cherry Bars for a Crowd can be served at room temperature or slightly chilled.
For a special dessert, serve each bar with a scoop of vanilla ice cream.
They are also delicious with whipped cream, a light powdered-sugar glaze, or a spoonful of lightly sweetened whipped cream.
For breakfast or an afternoon treat, simply serve the bars with coffee, tea, or a glass of cold milk.
Storage
Store the cooled bars in an airtight container in the refrigerator for up to 4 to 5 days.
Place parchment paper between layers if stacking them.
The bars can also be frozen. Wrap individual portions tightly and place them in a freezer-safe container. Thaw them in the refrigerator before serving.
Conclusion
Cherry Bars for a Crowd are the kind of dessert that makes homemade baking feel easy and rewarding. They deliver the familiar flavor of cherry pie in a convenient bar form, making them especially useful when you need a dessert that can feed a large group.
The buttery brown-sugar dough, sweet cherry filling, and golden topping create a comforting combination that works beautifully for holidays, family dinners, celebrations, potlucks, and everyday baking.
For Cherry Dessert Lovers
Anyone who loves classic fruit desserts will appreciate these cherry bars. They have the familiar sweetness of cherry pie, the convenience of a cookie bar, and the comforting texture of an old-fashioned homemade bake.
They are especially appealing to people who enjoy desserts that can be prepared in one pan and cut into individual servings. The recipe is simple enough for an ordinary afternoon but attractive enough to serve at a special gathering.
For an extra-special presentation, drizzle the cooled bars with vanilla glaze and place a few additional cherries on top just before serving.