
Introduction
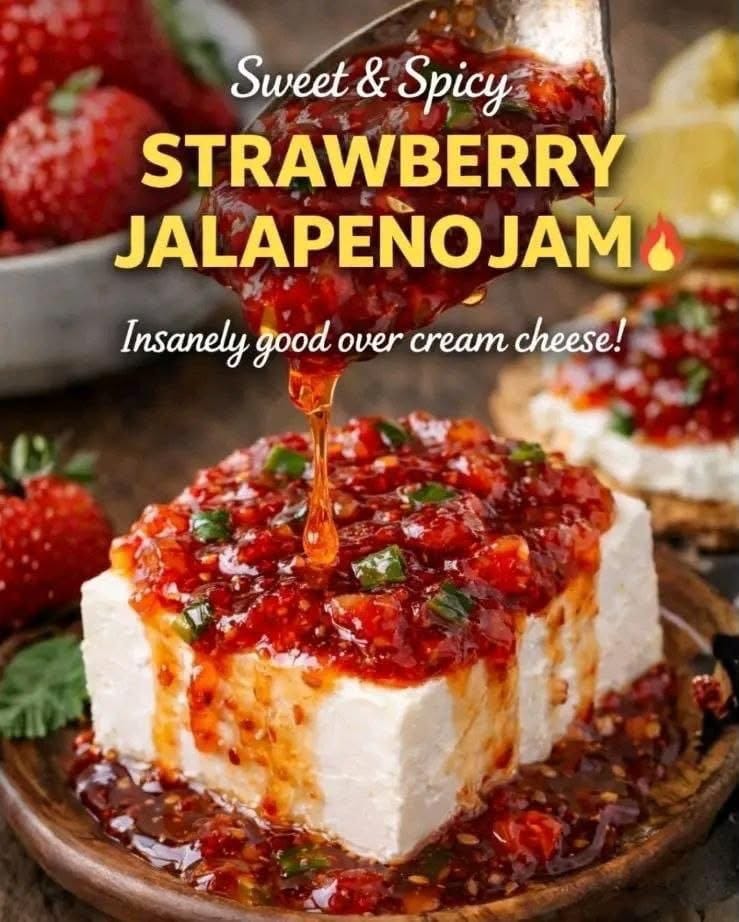
Prepare your taste buds for an adventure unlike any other! Today, we’re diving into the deliciously unexpected world of Strawberry Jalapeño Jam – a culinary creation that masterfully balances the vibrant sweetness of ripe strawberries with a tantalizing kick of spicy jalapeño. This isn’t your grandma’s classic preserves; it’s a modern twist that promises to awaken your palate and leave you craving more. Imagine the juicy burst of summer berries, followed by a gentle warmth that lingers, creating an irresistible dance of flavors in every spoonful. It’s a truly unique condiment that transforms ordinary meals into extraordinary experiences.
So, why bother making your own jam when shelves are stocked with countless options? The answer is simple: freshness, customization, and an unparalleled depth of flavor. Homemade Strawberry Jalapeño Jam allows you to control the quality of your ingredients, ensuring you get the brightest, most natural taste. More importantly, it empowers you to fine-tune the spice level to your exact preference – from a subtle whisper of heat to a fiery declaration. Beyond its incredible taste, there’s a profound satisfaction in crafting something so delicious from scratch, knowing exactly what goes into it. Plus, the aroma that fills your kitchen as the jam simmers is a reward in itself.
And let’s talk about versatility! While this jam is “Insanely good over cream cheese!” (and we’ll definitely get to that heavenly combination), its uses extend far beyond a simple appetizer. Picture it as a sophisticated glaze for roasted chicken or pork, a vibrant topping for your morning toast, yogurt, or even ice cream, or the star of an elegant cheese board. This recipe is designed to be straightforward, making the art of jam-making accessible to everyone, regardless of their kitchen experience. Get ready to create a condiment that will become a staple in your pantry and a talking point at every gathering.
Nutritional Information
Per serving (approximate values):
Calories: 85
Protein: 0.5g
Carbohydrates: 22g
Fat: 0.1g
Fiber: 1g
Sodium: 2mg
Ingredients
4 cups fresh strawberries, hulled and chopped (about 2 lbs)
2-4 medium jalapeños, stemmed, seeded, and minced (adjust to desired heat)
3 cups granulated sugar
2 tablespoons fresh lemon juice
1 teaspoon fruit pectin (optional, for a firmer set)
1/4 teaspoon salt
Instructions
Prepare the Strawberries: Begin by thoroughly washing your fresh strawberries. Hull them by removing the green leafy tops and the small core. Once hulled, chop the strawberries into small, roughly 1/2-inch pieces. If you prefer a smoother jam, you can mash some of the strawberries with a potato masher, leaving some chunks for texture. Place the chopped strawberries into a large, heavy-bottomed pot or Dutch oven.
Prepare the Jalapeños: Wash the jalapeños carefully. For a milder jam, it is crucial to remove the seeds and the white membranes, as these contain the majority of the capsaicin (the compound responsible for the heat). Use a small spoon or knife to scrape them out. Mince the jalapeños very finely. If you desire more heat, you can leave some of the seeds and membranes in, or even use an extra jalapeño. Add the minced jalapeños to the pot with the strawberries.
Combine and Macerate: Add the granulated sugar, fresh lemon juice, and salt to the pot with the strawberries and jalapeños. Stir everything together gently until the sugar is evenly distributed and coats the fruit. Allow the mixture to sit at room temperature for at least 30 minutes, or up to an hour. This process, called maceration, helps to draw out the juices from the fruit, creating a more flavorful syrup and aiding in the jam-making process.
Begin Cooking: Place the pot over medium-high heat. Bring the mixture to a rolling boil, stirring frequently to prevent sticking and ensure the sugar dissolves completely. A rolling boil is when the mixture continues to boil even while being stirred.
Add Pectin (Optional): If you are using pectin for a firmer set, stir it into the boiling jam mixture now. Make sure to stir vigorously for about 1 minute to ensure the pectin dissolves completely and doesn’t clump. If you are not using pectin, simply continue to the next step.
Simmer and Thicken: Once the jam reaches a rolling boil, reduce the heat to medium-low, maintaining a gentle simmer. Continue to cook, stirring occasionally, for 20-30 minutes. The jam will thicken as it cooks, and the fruit will soften. As it simmers, use a spoon to skim off any foam that rises to the surface; this will result in a clearer, more attractive jam.
Test for Set: This is a crucial step to ensure your jam will set properly. There are a few methods:
Cold Plate Test: Before you start cooking, place a small ceramic plate in the freezer. When you think the jam is ready, spoon a small amount onto the cold plate. Let it sit for 30 seconds, then push it with your finger. If the surface wrinkles and the jam holds its shape, it’s ready. If it’s still runny, continue to cook for another 5-10 minutes and retest.
Spoon Test: Dip a cold metal spoon into the jam, then lift it and tilt it sideways. If the jam forms a “sheet” or “flake” that drips off the side of the spoon rather than individual drops, it’s likely set.
Candy Thermometer (if using pectin): If you’re using pectin, the jam is generally considered set when it reaches 220°F (104°C) at sea level. Adjust for altitude if necessary.
Prepare Jars for Canning (if preserving): While the jam is simmering, sterilize your canning jars and lids. Wash jars and lids in hot, soapy water, rinse thoroughly, then place jars in a large pot of boiling water for at least 10 minutes. Keep them in the hot water until ready to fill. Set lids aside in a bowl of hot (not boiling) water.
Fill Jars: Carefully ladle the hot jam into the sterilized jars, leaving about 1/4 inch of headspace from the rim. Wipe the rims of the jars clean with a damp cloth to ensure a good seal. Place the lids and screw on the bands until fingertip tight (not too tight).
Water Bath Canning (for shelf stability): If you plan to store the jam at room temperature for an extended period, process the filled jars in a boiling water bath canner. Carefully place the jars into the canner, ensuring they are covered by at least 1-2 inches of water. Bring the water to a rolling boil and process for 10 minutes (adjust for altitude if necessary).
Cool and Store: After processing, carefully remove the jars from the canner and place them on a towel-lined counter to cool completely, undisturbed, for 12-24 hours. You should hear a “pop” sound as the lids seal. Check seals by pressing on the center of the lid; if it doesn’t flex, it’s sealed. Store sealed jars in a cool, dark place for up to 1 year. Unsealed jars or jam not processed should be stored in the refrigerator and consumed within 3-4 weeks.
Cooking Tips and Variations
Spice Control is Key: The beauty of homemade Strawberry Jalapeño Jam lies in its customizable heat. For a milder jam, be meticulous about removing all seeds and white membranes from the jalapeños – these are where most of the capsaicin (the heat compound) resides. If you prefer a medium kick, leave a few seeds in one or two of the jalapeños. For those who crave serious heat, you can leave all the seeds and membranes, or even add a tiny pinch of cayenne pepper or a small amount of habanero for an extra fiery punch. Always wear gloves when handling hot peppers to avoid skin irritation.
Achieving the Perfect Set: While the cold plate test is reliable, using a candy thermometer can provide extra assurance, especially for beginners. For jams without added pectin, the setting point is typically around 220°F (104°C) at sea level. If you find your jam isn’t setting, don’t despair! You can always add a small amount of liquid pectin (following package directions) and bring it back to a boil, or simply enjoy it as a delicious strawberry-jalapeño sauce for ice cream or pancakes.
Texture Preference: Do you like your jam chunky or smooth? This recipe yields a jam with lovely fruit pieces, but you can easily adjust it. For an even chunkier jam, simply chop the strawberries into larger pieces and mash less (or not at all) during the cooking process. For a smoother jam, use a potato masher more vigorously as the jam cooks, or for a perfectly smooth consistency, carefully blend a portion of the cooked jam with an immersion blender before jarring, then combine with the remaining chunky jam.
Beyond the Basic Flavor: While delicious on its own, this jam is a fantastic canvas for other flavors. Consider adding a small amount of fresh ginger, grated, for an extra layer of warmth and spice. A splash of apple cider vinegar can brighten the flavor and add a subtle tang. For a smoky note, you could even include a tiny amount of smoked paprika. Always start with small additions and taste as you go.
The Importance of Fresh, Ripe Fruit: The quality of your strawberries directly impacts the flavor of your jam. Choose firm, bright red, ripe strawberries that are in season for the best taste. Avoid any bruised or moldy berries, as they can affect the jam’s flavor and shelf life.
Canning Safety First: If you’re new to canning, always follow established guidelines for sterilizing jars and processing times. A proper water bath canning process ensures shelf stability and prevents spoilage. If you’re not comfortable with canning, simply store your jam in the refrigerator and enjoy it fresh.
Storage and Reheating
Refrigerated Storage: For jam that has not been processed in a water bath canner, or for any opened jars, store it in an airtight container in the refrigerator. It will typically last for 3-4 weeks. Always ensure the lid is tightly sealed to prevent air exposure, which can lead to spoilage.
Canned Storage (Shelf-Stable): Properly water-bath canned and sealed jars of Strawberry Jalapeño Jam can be stored in a cool, dark pantry or cupboard for up to 1 year. Once a jar is opened, it must be refrigerated and consumed within 3-4 weeks. Before using, always check the seal by pressing the center of the lid; if it springs back, the seal is broken, and the jam should not be consumed if it’s been stored at room temperature.
Freezing: If you prefer not to can, this jam freezes beautifully. Pour the cooled jam into freezer-safe containers or bags, leaving about 1/2 inch of headspace to allow for expansion. It can be stored in the freezer for up to 6 months. Thaw in the refrigerator overnight before use.
Reheating: While jam is typically enjoyed at room temperature or slightly chilled, you might want to gently warm it if you’re using it as a glaze or a warm topping. To reheat, spoon the desired amount into a small saucepan and warm over low heat, stirring occasionally, until it reaches your preferred temperature. Be careful not to overheat, as this can alter the texture. Alternatively, you can microwave small portions in 15-30 second intervals, stirring between each, until warm.
Frequently Asked Questions
Can I use frozen strawberries for this recipe?
Yes, you can absolutely use frozen strawberries! Thaw them completely before cooking and drain off any excess liquid. Keep in mind that frozen strawberries often release more water, so your jam might take a little longer to cook down and thicken. The flavor will still be fantastic!
What if my jam doesn’t set properly?
Don’t worry, an unset jam is still delicious! If your jam doesn’t reach the desired set, it can be enjoyed as a gourmet sauce or syrup. It’s wonderful over ice cream, pancakes, or even mixed into yogurt. If you truly want a firmer jam, you can re-cook it with added liquid pectin (following the pectin package instructions) or simply enjoy it as a looser “preserve” or “sauce.”
How can I make this jam less sweet?
Reducing the sugar in jam can be tricky, as sugar plays a crucial role in the setting process and preservation. If you significantly reduce the sugar, you might need to rely more heavily on pectin to achieve a good set, or accept a looser consistency. For best results, use “low-sugar” or “no-sugar needed” pectin, which is formulated to set with less sugar. Always follow the specific instructions on the pectin package when altering sugar content.
What are some creative ways to use this jam besides with cream cheese?
This jam is incredibly versatile! Beyond the classic cream cheese appetizer, try using it as a glaze for grilled chicken, pork tenderloin, or even salmon. It makes a fantastic sandwich spread, especially with roasted turkey or ham. Spoon it over goat cheese for an elegant appetizer, or mix it into a vinaigrette for a unique salad dressing. It’s also delicious swirled into plain yogurt, spread on cornbread, or as a topping for vanilla ice cream or cheesecake.