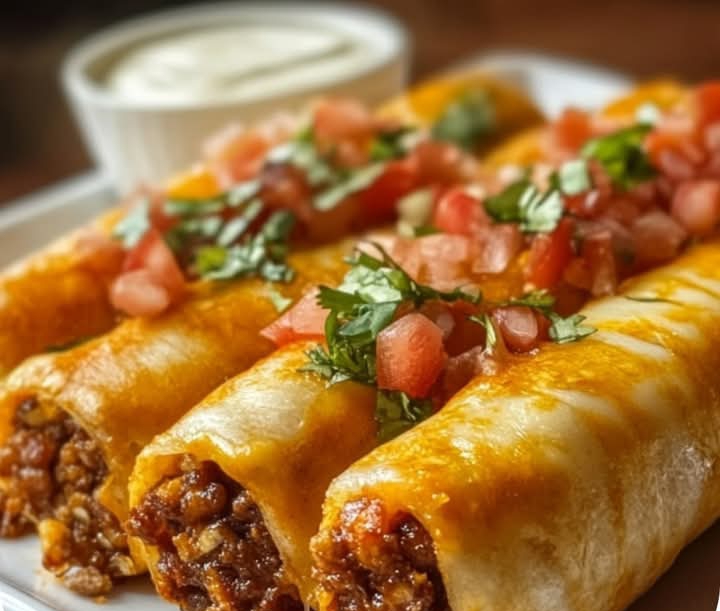
HomeCheesy Taco Sticks
Cheesy Taco Sticks
Why You’ll Love This Recipe
There’s so much to adore about Cheesy Taco Sticks. Here’s why they’re a must-try:
Crispy and Cheesy : The perfect combination of a crunchy exterior and a gooey, flavorful interior.
Packed with Flavor : Loaded with taco seasoning, cheese, and optional mix-ins like ground beef or beans.
Kid-Friendly : A fun, handheld snack that kids (and adults!) will love.
Customizable : Add your favorite taco toppings or adjust spice levels to suit your taste.
Versatile : Serve them as an appetizer, snack, or even a creative meal option.
Ingredients You’ll Need
The secret to these taco sticks lies in their flavorful filling and crispy coating. Here’s what you’ll need:
For the Filling:
1 cup shredded cheese (cheddar, Monterey Jack, or a Mexican blend works great)
1/2 cup cooked ground beef or turkey (optional; seasoned with taco seasoning)
1/4 cup black beans or refried beans (optional for extra flavor)
2 tablespoons cream cheese (softened, to help bind the filling)
1 teaspoon taco seasoning (store-bought or homemade)
For Coating:
1 cup all-purpose flour
2 large eggs (beaten)
1 1/2 cups breadcrumbs (plain or panko for extra crunch)
1 teaspoon garlic powder (optional, for added flavor)
1 teaspoon paprika (optional, for color)
For Serving:
Salsa (for dipping)
Sour cream or guacamole (optional)
Shredded lettuce, diced tomatoes, or olives (for garnish)
Step-by-Step Instructions
Ready to whip up these crispy, cheesy delights? Follow these easy steps:
Step 1: Prepare the Filling
In a mixing bowl, combine the shredded cheese, cooked ground beef (if using), beans, cream cheese, and taco seasoning. Mix until well combined.
Divide the mixture into 8–10 equal portions and shape each into a log or stick shape. Place them on a plate and freeze for 15–20 minutes to firm up.
Step 2: Set Up the Coating Station
Prepare three shallow bowls:
Bowl 1: Flour
Bowl 2: Beaten eggs
Bowl 3: Breadcrumbs mixed with garlic powder and paprika (if using).
Step 3: Coat the Taco Sticks
Roll each frozen cheese log in the flour, shaking off any excess.
Dip it into the beaten eggs, ensuring it’s fully coated.
Roll it in the breadcrumbs, pressing gently to adhere. Repeat the egg and breadcrumb steps for an extra-crunchy coating.
Step 4: Cook the Taco Sticks
Option 1: Baking
Preheat your oven to 400°F (200°C) . Line a baking sheet with parchment paper or lightly grease it.
Arrange the coated taco sticks on the baking sheet and spray them lightly with cooking oil for extra crispiness.
Bake for 15–20 minutes , flipping halfway through, until golden brown and crispy.
Option 2: Frying
Heat about 1–2 inches of vegetable oil in a deep skillet over medium heat until it reaches 350°F (175°C) .
Fry the taco sticks in batches for 2–3 minutes per side, or until golden brown and crispy.
Transfer to a paper towel-lined plate to drain excess oil.
Step 5: Serve and Enjoy
Serve the taco sticks warm with salsa, sour cream, or guacamole for dipping.
Garnish with shredded lettuce, diced tomatoes, or olives for a festive touch.
Why This Recipe Works So Well
The magic of Cheesy Taco Sticks lies in their balance of textures and flavors. The gooey, cheesy filling bursts with taco-inspired goodness, while the crispy breadcrumb coating adds satisfying crunch. By freezing the filling before coating, the sticks hold their shape during cooking, ensuring a clean, mess-free bite every time. Together, these elements create a snack that’s as fun to eat as it is easy to make—a true crowd-pleaser.
Variations to Try
While the classic version is divine, here are some creative ways to switch things up:
Add Veggies : Stir in finely chopped bell peppers, onions, or jalapeños for extra flavor and nutrition.
Make Them Vegetarian : Skip the meat and use beans, corn, or sautéed mushrooms as the base.
Spice It Up : Add diced jalapeños, red pepper flakes, or hot sauce to the filling for a kick.
Gluten-Free Option : Use gluten-free flour and breadcrumbs to accommodate dietary restrictions.
Mini Taco Bites : Shape the filling into smaller balls for bite-sized appetizers.
Tips for Success
Freeze Before Coating : Freezing the filling helps prevent the cheese from oozing out during cooking.
Double-Coat for Extra Crunch : Dip the sticks twice in the egg and breadcrumb mixture for a thicker crust.
Use Fresh Breadcrumbs : For the crispiest texture, make your own breadcrumbs by pulsing stale bread in a food processor.
Save Leftovers : Store cooled taco sticks in an airtight container in the refrigerator for up to 2 days. Reheat in the oven at 350°F for 5–7 minutes to restore crispiness.
Experiment with Dips : Try queso dip, ranch dressing, or chipotle mayo for variety.
Serving Suggestions
These Cheesy Taco Sticks are incredibly versatile and pair well with a variety of occasions. Here are some ideas to enhance your experience:
Game Day Snack : Include them on a game day spread alongside wings, sliders, and nachos.
Party Appetizer : Serve them as a fun starter at birthday parties, holiday gatherings, or potlucks.
Dinner Twist : Pair them with a side salad or soup for a creative meal option.
Brunch Idea : Serve them with scrambled eggs, hash browns, and fresh fruit for a fun brunch dish.
Kids’ Lunchbox : Pack them in lunchboxes with dipping sauces for a fun school lunch.
Final Thoughts
With their crispy coating, cheesy filling, and bold taco flavors, Cheesy Taco Sticks are a treat worth making again and again. Whether you’re hosting a gathering, celebrating a special occasion, or simply craving something fun and indulgent, this recipe delivers big on taste and charm.
So, the next time you’re in the mood for something crispy, cheesy, and utterly delicious, give these taco sticks a try. Trust us—they’re quick, easy, and absolutely divine!
Have you tried this recipe yet? Share your thoughts, tips, and variations in the comments below. Happy cooking!